Hand-Drawn README Diagrams with the Excalidraw CLI
I wrote a Claude Code skill that turns a short spec into a hand-drawn README diagram, with light and dark versions. It uses the Excalidraw CLI to render the images locally, without an account or API key.
Installation
npm i -g @excalidraw/cliIt needs Node.js 22 or later, plus Chrome, Chromium, Edge or Firefox installed for rendering.
Writing the scene
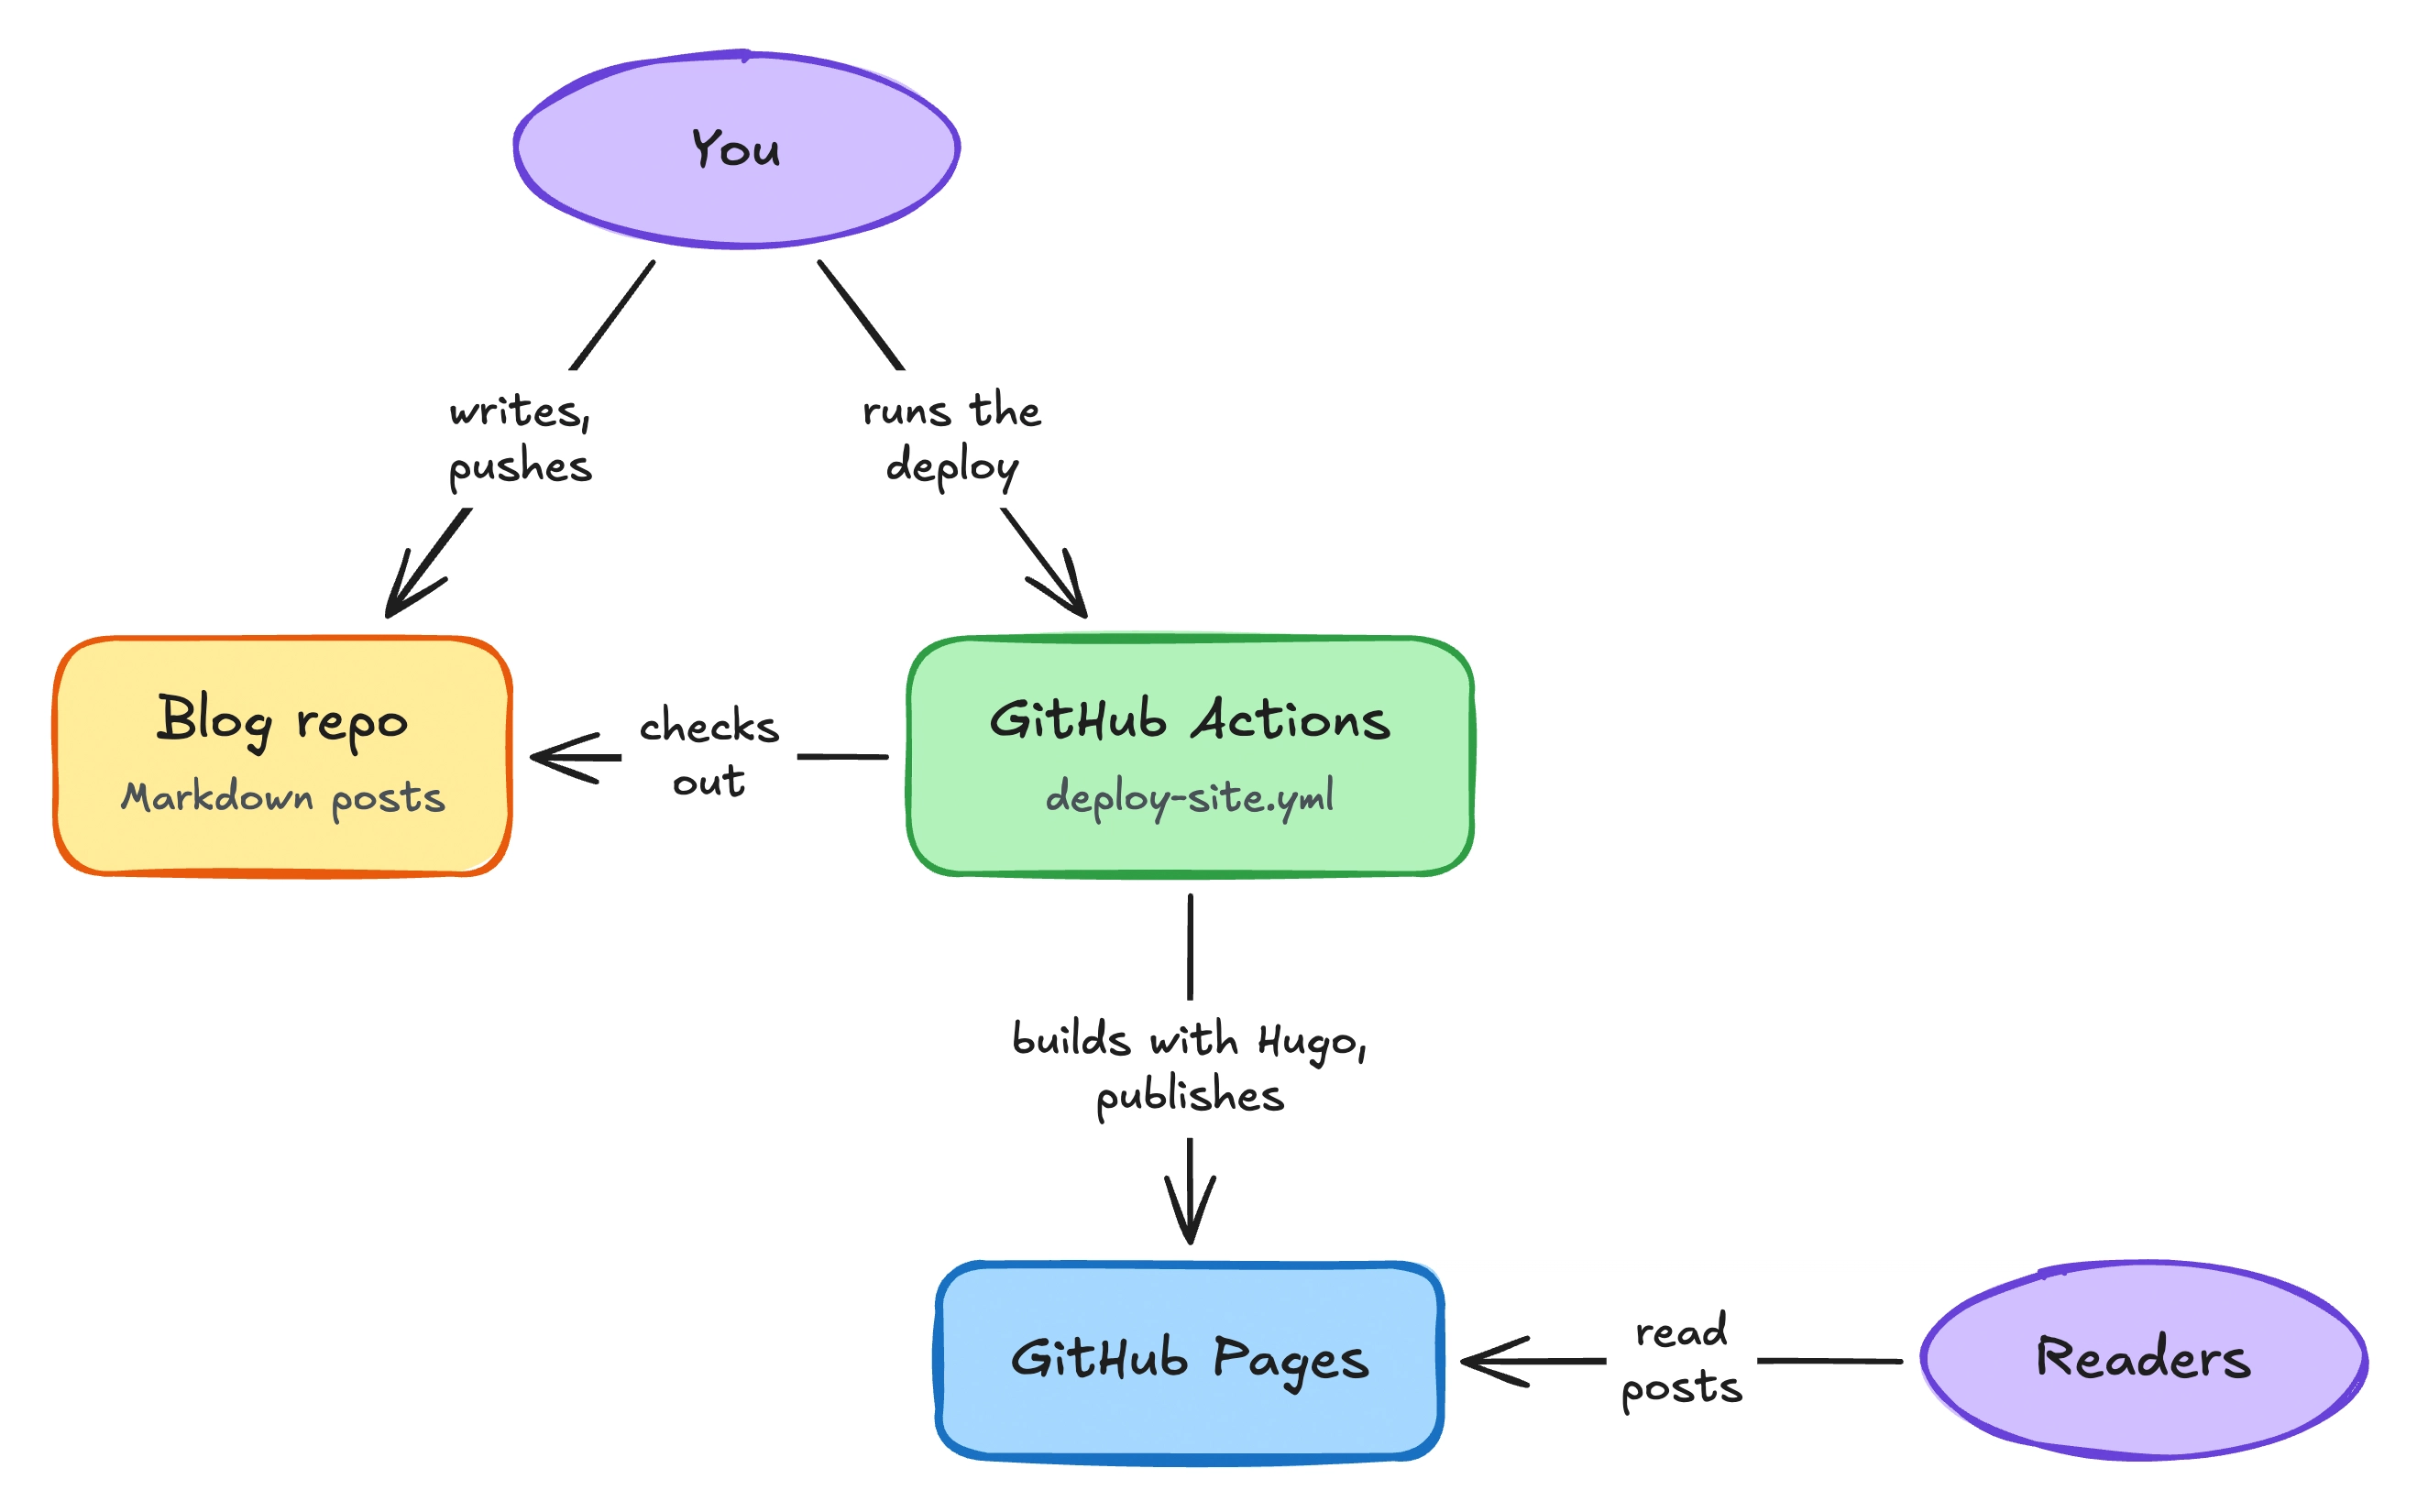
The scene is the hard part. An .excalidraw file is JSON with about 30 fields per element, including positions, sizes and bindings between elements. Figure 1 is 22 elements and 21 KB. In my first attempts, the agent wrote that JSON directly, but labels overlapped each other and the boxes.
The readme-diagram skill (
source
) splits the job in 3. The agent writes a short spec, a Python script turns it into the scene, and the CLI renders it. This is the 932-byte spec behind Figure 1:
{
  "font": "hand",
  "grid": {"col": 330, "row": 220},
  "nodes": [
    {"id": "you", "label": "You", "kind": "person", "col": 0.5, "row": 0},
    {"id": "repo", "label": "Blog repo", "note": "Markdown posts", "kind": "store", "col": 0, "row": 1},
    {"id": "actions", "label": "GitHub Actions", "note": "deploy-site.yml", "kind": "trigger", "col": 1, "row": 1},
    {"id": "pages", "label": "GitHub Pages", "kind": "system", "col": 1, "row": 2},
    {"id": "readers", "label": "Readers", "kind": "person", "col": 2.05, "row": 2}
  ],
  "edges": [
    {"from": "you", "to": "repo", "label": "writes, pushes", "wrap": 8},
    {"from": "you", "to": "actions", "label": "runs the deploy", "wrap": 8},
    {"from": "actions", "to": "repo", "label": "checks out", "wrap": 6},
    {"from": "actions", "to": "pages", "label": "builds with Hugo, publishes"},
    {"from": "readers", "to": "pages", "label": "read posts", "wrap": 5}
  ]
}
The script places each box on the grid, sizes it to fit its text and uses kind to choose its colour. It also keeps the arrows attached to their boxes. You can still edit the scene on excalidraw.com.
Before rendering, the script checks for overlapping labels, labels covering boxes or most of their arrows, and arrows passing through boxes. It prints any problems it finds.
The agent fixes those problems, renders both PNGs and opens them to check the layout. It then fixes anything the script missed. In my tests on 3 projects, this took 2 to 3 iterations.
Rendering a scene
The
companion code
includes the spec above as example/blog.json. From the excalidraw-readme-diagrams directory, run the skill’s Python script to build the scene:
python3 skills/readme-diagram/scripts/build_scene.py \
  example/blog.json \
  example/blog.excalidraw
Then render the dark version:
excalidraw render example/blog.excalidraw \
  --theme dark \
  --scale 2 \
  --out example/blog-dark.png
Things worth noting:
- For the light version, run the command again with
--theme lightand save it toexample/blog-light.pngusing--out. --scale 2renders the image at twice the normal width and height, up to the output size limit. The default scale is 1.- Images are limited to 2048px wide by default. For a wider image, add
--max-width 4096. I used this with--scale 3for Figure 1. - Use
excalidraw render -to pipe scene JSON into the command instead of saving it to a file first.
Embedding in a README
A <picture> element lets GitHub show the version that matches the reader’s theme:
<picture>
  <source media="(prefers-color-scheme: dark)" srcset="example/blog-dark.png">
  <img alt="How this blog gets published using GitHub Actions, Hugo and GitHub Pages."
      src="example/blog-light.png" width="880">
</picture>
The width attribute controls how wide the image appears in the README. For example, a PNG that is 1760 pixels wide can be displayed at 880 pixels wide with width="880". The extra pixels help text look sharp on high-density screens.
I still keep the architecture diagrams in docs/ as text, because agents read and edit them on every change. The hand-drawn versions go in the README, where people read them.